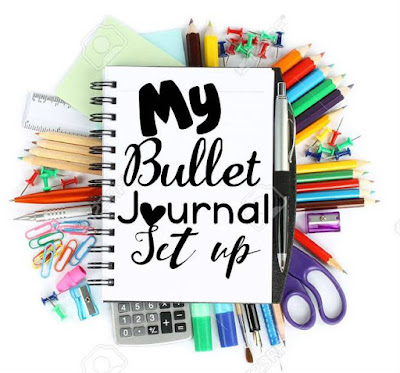
DIY Planner/ Organizer
DIY time. Even though this is self-explanatory I just wanted
to share my version of it and you can either take it or leave it as they would
say. Call me crazy for getting excited about it then Im crazy and never want to
be normal. We all have our something we love doing.
So if you know me I love to plan things whether it is a
party, a surprise, a gift, a special moment or even a trip away with my love. I
know you cannot plan everything to the tee as life does what it is planned to
do either way. But as far as I can plan I will try.


I was watching some videos on Youtube and I came across this
thing that is going on across the whole of America. And the more I researched
it the more interested I got. Maybe it was the courful paper and stickers that
attracted me even more who knows but I knew that this is something I wanted to
make.
Overseas they call it either the Filofax planner, Erin
Condren planner (which I wish I could have) and even the Kiki K planner. This
is where I wish stayed overseas to be able to order on line they have it so
easy. But I took the information and I made it myself. I loved to see how some
made it themselves and what they used that was not expensive that helped me a
lot to get all the needed things.
I love stationary omw you would have to drag me away from
any stationary I cant stop myself. Which made me want to make this even more.


So getting started I found out that you can download all the
pages you want in your planner from Pinterest, another reason to love that app.
All you have to type in is free planner pintable’s. You also need to decide on
what you would like your planner to have in and to be about. I made mine for
personal, photography and blog.
The tabs that I wanted were:
·
Dates to remember (just like birthdays anniversaries
and what else)
·
Then I did a weekly spread (to add I did not
download that as if I were to print that It would be a lot of pages so I got a
dairy that showed the weeks on one page and I put that in my planner)
·
I wanted a daily spread (which I will use if I
know I have something important to do on a day where I have a lot that I need
to remember)
·
My photography ( where I can keep track of the
shoots I have done and will be doing and regards to payment)
·
My blog posts( where I can write ideas I see so
I don’t always have writers block )
·
Finance ( I like this one where I can keep track
of where spend money and budget for the month)
·
And notes ( important to remember and just
information , I used just blank lined pages)
Also things you might need:
·
Colour paper
·
Or scrapbook pattern paper that you love
·
One hole punch that I found at PNA for R30
·
Ring Binder or Filo fax
·
Tabs
·
Any random stickers
·
Paper clips or anything you want to use to keep
your place even magnetic book markers
·
Sticky Notes
·
And any craft things you want to make it
personal
 |
| How Cute is this Washi Tape!!! |
So after you know what you want and you saved and printed
all the pages you need to decide the size you want, I went for A5 something
that if I need to I can put in my bag. I’m not that type of planner and I don’t
have that much going on in my life right now to have to take it with me 24/7. I
see the moms use it a lot as it helps them keep track of the kids schedules.
So now the look I wanted it to be in a Filofax but I was not
going to pay R300-R500 for one. I tried looking on line but there was not
anything that caught my eye. I wanted it to be a nice color other than just
black. I then looked further on what else a person can do and saw that you can
take a normal ring binder file even the A4 size and you can cut it to the size
you want just cover it and there. Which what I was going for but I just seem to
eager to do it that way. I then came to the idea to do it with the spiral
binder. Where the front and back cover was already there and was a pattern that
I liked. It already had blank pages for me that I could use where needed.
I got the one hole punch which made it easy for me to make
all the holes needed. Ps there was a lot lol. I laid it out as I wanted it and
put it together as you see below.
I am proud of my planner I love it and I know I made it.
Of course this is my first time and I am new at it and so as
the year goes on I will know what I like and how I would like next years to be.
So far I know that I would like to find the Filofax or would try make it with
the ring binder type so that I can add and take out things easier. That is how
we all learn.
So here is my planner
I want to add like a front something saying the year but I
don’t know just don’t want something coming off and all so I will leave it like
that until I come up with something else
I got a normal little girls head band to keep my planner
tight for when it might get bigger. And I glued some flowers on you can make it
any way you want this is my first one I got a pack of 4 head bands I think so I
will be trying out different ones.
Inside I have as they call it my dash board. Where I placed
sticky notes that I would use throughout the planner for reminders or notes I
need to place on a date.

 |
| All my Sticky Notes |
The next page I have just a few blank sheets where I can use
for whatever. I made a little pocket on the side where i can add the slips or notes I got.

 |
| Just a little different page |
Then you get to the dates as you can see I put some bdays in
there so long that I can think of.


Then you get my week section where you can see the so called
action happens I didn’t over decorate as there is not a lot of space but I made
it a bit more colourful. I love that the calendar came with notes on the side
that I can use to put reminders for the week.


Then my next page is my photography I could not find a free
printable that I liked and wanted to use so I just made my own with the
information I needed.


Then my blog I still want to add blank pages in for just
random ideas and all but I found the free printable that has the information I
need and really like how it is laid out

Then finance, I love that there is a expense tracker that
you can write down the things you spent on what day and that you can also
budget the month always helpful

Then lastly I have the notes so far I have my Bridesmaids
duties there things I want to remember and need to get done.

So that is that plain and simple like I said take it as you
want and make it if you wish. I think this will help a person to stay and be
more organized there is so much options you can place in for yourself cleaning
schedule if you are like that, fitness, meal plans, goals whatever you have you
can find.
I found most of my things at the Crazy store they have
amazing craft things. I made my paper clip more personal by adding the ribbon.
You can look on pinterest, google and youtube for ideas on how to make your own different ways styles and one to fit your budget
Hope this helped I know this is a long one and hopefully I
got in all the information I needed.
Enjoy and plan ahead J

Comments
Post a Comment